
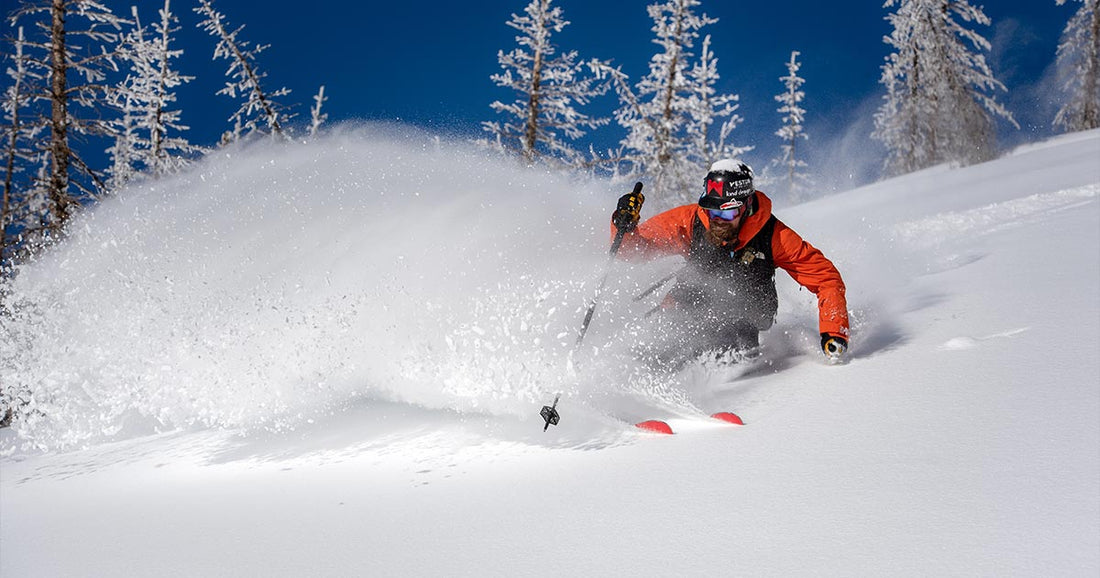
With earning your turns exploding in popularity over the past years, you might be thinking about getting into it yourself. Rather than just struggle busing in a boot pack, or using your heavy park skis, there are a few considerations you need to take into account to get the best out of your weekend. Our resident ski expert and member of our design team Nate Dumais has the low down on what you need. Reading not your thing? Watch the Webinar sponsored by Capow Guiding.
Contributing Expert:
- Nate Dumais
- Turner, ME
- Demo/Tiny House Manager, Fleet Tech, Warranties
- The Ski and Sno-cat Guy

Selecting The Best AT Ski Gear For You
When buying a touring specific ski, you’ll want to look at the following - Weight, Waist Width, Camber underfoot.

Weight
The best AT ski walks the balance of uphill performance with downhill fun. Go too light and you sacrifice durability and that bomber construction you're used to on the resort. Go too heavy and you’ll be calling it a day by 10 AM.
Waist Width
A nice touring width underfoot, is +/- 105mm underfoot. This general sizing will cut some weight versus touring with something +/- 120mm. The 105 range also puts less torque on your bindings and knees if you happen to be on a fall-away icy skin track. In this case a more narrow ski will place your boot and binding closer to the hill and eliminate the need to over pressure that hill side edge. Those big wide powder sticks will add both weight and be a struggle on this slick side hill skin tracks. Balance is key.
Profile
One of the most important things to look for is what is the profile of your ski. We find the ideal profile is camber under foot with early rise tip and tail. Camber under foot allows for maximum skin contact while skinning up, and adds confidence when you hit variable conditions. Early rise allows for you to maintain float in the deepstuff we all seek. Avoid heavily rockered skis, as this will have a narrow contact point for skinning and make getting uphill difficult.
Other factors such as stiffness and turning radius are much more a personal preference and dependent on the terrain you like to ski on. Trees your jam? Go with something that has a tighter radius, and is a touch softer for a more playful and poppy ski to bounce in and out of trees. Big open bowls? Go stiff and big turning radius for stability as you charge big lines.
Pro Rec: The Weston Summit, in a 186, checks these boxes at 105mm underfoot, 16.5m turn, 3.8 lbs, 70% camber and a strong, stable core.

What Are The Best Bindings For Backcountry Skiing?

Tech Toe - The industry standard.
The majority of binding manufacturers make a version of a lightweight tech, or toe pin, binding. 4 manufacturers and bindings that stand out above most are the Marker Alpinist 12, Salomon MTN, Dynafit Rotation 12, and G3 ZED 12. All of these bindings are incredibly lightweight, have release settings, option for a brake, and multiple ascension levels. Each binding will have its own little quirks to deal with, but the more you use them, the more second nature it will become. All of these bindings do require a toe pin, or tech, ski boot.
Cross over bindings - one binding to do it all.
If you want a “cross over” style binding, a binding thet features a toe pin setup for the ascent that transfers to a normal alpine toe for the descent, and a step in heel, you can check out the Salomon Shift or the Marker Duke PT. Both of these bindings can be used with either a toe pin boot or normal alpine boot. In order to tour with these bindings, however, you must have a toe pin ski boot. You CANNOT tour with these bindings with an alpine boot.
What about frame bindings?
If you are touring with a normal alpine boot you can look at some frame binding options from Marker with the F10 and F12 or Tyrolia with their Ambition 12 and Adrenaline 14. This is a cost effective way to get into the sport, but you lose out many of the benefits of a modern touring binding. They are the heaviest option, a further forward pivot point also means you’ll be working harder on the up. Additionally, touring with traditional alpine boots means you won’t have as much range of motion on your touring stride. This can be a good option if you just want to get in a lap before lifts open, but generally recommend against it if you are taking getting into the backcountry seriously.
Pro Rec: Marker Aplinist 12

What Are The Best AT Boots For Backcountry Skiing?
Like AT skis you want to find a boot that is lightweight, but rugged enough where you are not sacrificing performance. AT or Tech boots have made leaps and bounds in performance over the past few years. Updated plastics have enabled manufacturers to keep the boots light, but stiff. Now, a 130 flex tech boot can perform with the best 130 alpine boot, at half the weight.

What is Walk Mode and why is it important?
Having a boot with “walk mode” allows the cuff of the boot to move more freely from the shell allowing for easier forward lean.
It’s all in the Soles.
Make sure your boot has a vibram sole. Chances are you will be boot packing at some point and having that traction and support is an important safety element. Additionally, if you are every fortunate enough to add a snowmobile into the mix, you can have traction on the rails of the sled. Additionally if you have a Toe Pin binding, make sure you have a Toe Pin Boot.
Buckles - How many should I have?
Some lighter weight boots are dropping buckles to save weight. If your an aggressive rider, keep the four for a ski more similar to your resort boot.
Personal Preferences - Fit
Having a boot that fits properly is key to having a happy day in the backcountry. Two things to pay attention to is the last and the volume. The last of the boot refers to how wide the boot is, typically some companies have a wider last than others so if you have a wide foot, ask your local shop to recommend companies with a wider last and vice versa.
Volume refers to how much space there is in the boot it self. If you have high arches, look for a high volume boot and vice versa.

Pro Rec: There are plenty of amazing AT and tech boots on the market these days. Scarpa has been on the forefront of tech boots for many years. Their Maestrale RS 120 is amongst the most sought after boots on the market. Tecnica’s Zero G Pro Tour 130 is a few generations in and is for those seeking a stiff, high performing lightweight boot.Tecnica is manufacturer that has not been on the tech scene incredibly long, but they have been making ski boots longer than most others and arguably make some of the best boots on the planet. Salomon created the S/LAB MTN and S/LAB X-Alp tour boots, which utilize a 2 buckle system. The X-Alp eliminated the standard toe, moving the pivot point of the boot closer to your foot. If you don’t want to pull the trigger on a full on tech boot, there are options for you. The Lange XT130 Free and Tecnica Cochise are both great choices for cross over boots, utilizing toe pin inserts, as well as, standard alpine boot sole and can be used with tech bindings or normal alpine bindings.
What Are The Best Skins For Backcountry Skiing?
The other piece of the puzzle is skins. Guide Adam Zok gives us the low down on what you should be looking for in skins.

Types of Skins, Nylon, Synthetic or Mix?
In a perfect world, your skins would be frictionless as they move forward along the snow during each step forward, and grip like hell once engaged - but in reality, you have no choice but to strike a balance between these two characteristics. There are two materials that the plush material on climbing skins can be made from: nylon and mohair. Nylon provides more grip, less glide, and is heavier. Mohair isn’t as grippy, but glides better and weighs less. It’s also possible to get skins that are made from a combination of the two (my personal favorite).
There are very high traction skins available made out of thick nylon but I wouldn’t recommend these to anyone. The extra grip may serve as a useful crutch when you’re first learning to splitboard, but you’ll outgrow them very quickly. They’re also extra awkward to slide downhill with, which has to be done from time to time. Skins made out of thinner nylon are a nice middle-of-the-road option for beginner skiers that aren’t completely dialed with their skinning technique. The skins I use are made out of 70% mohair and 30% nylon, and are a great choice for users with at least an intermediate level of touring skill.
How do I trim my skins and care for them in the backcountry?
Trim your skins so that when it’s on your ski, you can just barely see the entirety of the metal edge on both sides. In the field, you don’t need to bother using “cheat sheets” when you fold your skins up, nor do you need to place them in the bag they came with - these are just extra items to carry and steps to take that don’t really serve a purpose. If your skins are hard to separate, you can put them between your legs and use your lower body to assist you, or you can use the rigidity of one of your skis as something to pull against. When taking your skins on and off, try not to get snow on the glue - this will prevent it from sticking well. If your glue does get a bunch of snow on it, you can scrape it off using the edge of one of your skis or a dry pant leg.
If you’re traveling through snow that’s especially wet and soft (ie. hot pow baking in the sun on a spring day), it will probably start to stick to the bottom of your skins and make travel difficult. To combat this, you can rub skin wax onto the plush side of your skins - it’s not perfect, but it certainly helps. If the snow continues to stick, I’ll pick up my foot and whack my ski with my pole every so often as I walk, and maybe start swearing a little.
Do I Need Specific Poles For Backcountry Skiing?
The short answer is NO. The poles you use for resort skiing are just fine. However there are a few things you do want to look for. Make sure you have a powder basket. Many of the poles skiers use on piste won’t provide enough surface area when you push down in the snow to stay on top. A powder basket addresses this. Some people also like to adjust their pole length. Longer for the up hill or double polling out the approach, then shorter for the down.
I've Got My Kit Dialed. Now What?
Get Educated
Go get your avalanche education before venturing into the backcountry!
What Other Gear Do I Need?
You will need some other specialized gear including a pack, avalanche safety and even specific layering. Check out our resources on these here.
Where Can I Go?
Check out our post on less crowded touring zones to explore in Colorado here or head over to our main blog page to discover more zones in other regions such as the PNW, California, the Northeast and more!
WATCH THE WEBINAR
NEXT STEPS...
Get The Education: Avalanche Education Programs