
How To Plan A Backcountry Trip
Contributing Expert:
Justin Ibarra
- Summit County, Colorado
- 14 years in the backcountry
- Colorado Adventure Guides

Am I Ready?
Start with a self check-in to asses whether or not you feel comfortable to head out into the backcountry.
What level of avalanche education do I have?
Before you plan your backcountry trip, it is important that you have the knowledge and education to do so. It is recommended that you do not go into the backcountry without this base knowledge of information, or if you do that you find a mentor to take you under their wing and help show you these processes.
Should I hire a guide?
If you don’t have the education, or you just want to learn under the experience of a trained guide or instructor in a more personal and intimate atmosphere, then do just that and hire a guide. Many people find that hiring a guide allows them to get more value out of their experience as they are able to cater the day toward their own personal goals and objectives.
Captain Ibarra (Photo: Jeff Kepler)
Step 1: Assemble Your Group
(Photo: Isaiah Branch-Boyle )
The first thing that we need to do when planning a backcountry trip is to decide who we want to go with. Assembling your tour group for the day can be just as important as all other aspects of planning a backcountry tour. The group that you choose to go with, coupled with the avalanche and weather forecast, should be your deciding factors in what terrain you decide to tour in for the day. Things to think about when assembling your tour group.
Numbers
The ideal touring party is 3-5. When you have more then that you should consider splitting into multiple groups.
Align risk tolerance levels
While you may have a group with varying levels of experience and risk tolerance levels, it is important to set the tone for the trip by understanding that everybody will travel to the lowest risk tolerance level of the team.
Set goals for the day
Along with risk tolerance it is important to align the group goals for the day. Are the goals for the day to ski a big line or peak? Or maybe the goal for the day is just to get out for some mellow turns and enjoy the fresh air.
Discuss individual medical or any other pertinent info
Does somebody have asthma? Did somebody pull a double shift yesterday and didn’t sleep at all? Discuss anything and everything that can potentially factor into the day.
Set the verbal contract
Everybody agrees to travel together, decide together, and respect anybody’s veto.
Step 2. Check The Forecast / Anticipate The Hazard
Now that we have our team, the next thing that we want to do is to anticipate the hazard for the day. This is where we will be utilizing weather and avalanche forecasts to help better understand what we may be encountering for the day.
Weather
Avalanche
- The Danger Rating
- Avalanche Problem Type, distribution, likelihood, and size potential
- Summary and detailed report of current conditions
- Recent reported avalanche activity
- Recent reported field and weather observations
Resources:
https://avalanche.org/ All forecasting centers in the US
https://avalanche.ca/ Canada forecasting center
https://avalanche.state.co.us/CAIC
Ask The Questions
- What is the weather and how can it affect the hazard or our travel for the day?
- What is the avalanche danger, what are areas of terrain to potentially avoid or what areas of terrain can we travel into, and what are relevant observations that we can make today in relation to the avalanche problem(s) we are likely to encounter?
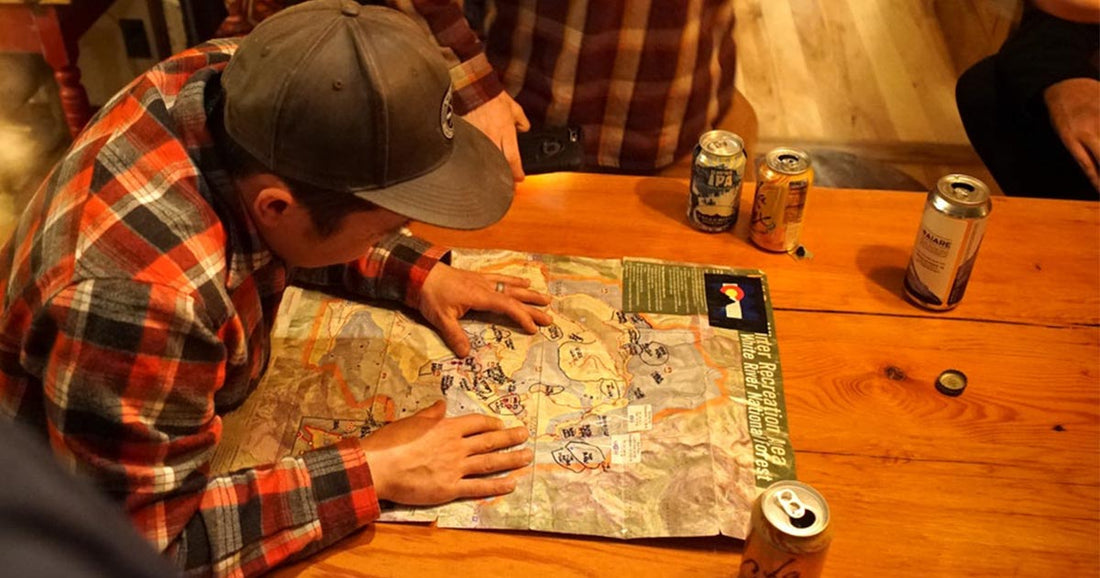
Step 3. Plan Your Tour
We have our team assembled with our risk tolerance levels aligned, goals set for the day, and agree to utilize teamwork. Now we also know what the weather forecast is for the day and how it may affect the hazard and/or our travel. We have read the avalanche forecast and all have an understanding of the overall hazard, along with what avalanche problem types and where we are likely to encounter them. With that in mind we have an idea of relevant observations we want to make in relation to the avalanche problem and weather.
Annnndddd now with all that in mind it's time to decide where we are going to go.
Finding zones to ski/ride in during the beginning of your backcountry career can be frustrating. There are many outlets that you can utilize to help ease this process and eventually you should shoot to have a zone/run catalog that you can pick and choose from based on your group and the conditions for the day. Below are some resources to help you with this process.
Guidebooks
Digital Resources
Blogs
A quick Google search may be your best friend. You can find blogs, terrain photos, trip reports, etc. All valuable information in helping you to develop a trip catalog.
Social Media
Similarly you can find terrain photos, trip reports, etc.
Google Earth
This is a great resource to help you better understand the terrain by seeing it in 3D. You can also draw and save routes, zones, and much more and then upload into Caltopo.
Caltopo
This has become a staple for trip planning digitally. With the capability of saving your map, adding zones/runs/trailheads, utilizing different maps and overlays including slope angle shading and more, this is an excellent resource for trip planning.
Avenza
This is an offline mapping tool that you can use in conjunction with Caltopo. It allows you to download maps for offline use and utilizes a geospatial PDF, which will use the GPS on your phone to pinpoint where you are on the map.
Gaia
A commonly used navigation app that allows you to save maps, utilize map overlays, track your route, and more.
Rakkup
An online and mobile guidebook app used in conjunction with Beacon Guidebooks.
Map and Compass
We are living in a digital world, but in the world of backcountry travel we never want to solely rely on technology. It is very important to have or gain the skills or using a map and compass. Think of orienteering as equally important as medical and avalanche training. Learn how to use them and always carry a backup map and compass in your pack.
Step 4. Identify A Route Plan
Now that you have chosen the zone that you are going to be touring into based on the group, weather, and hazards for the day, we start to identify a route plan that considers all of these.
What is your less risky plan B and/or C?
Are there certain decision points along the route?
Other anticipated hazards?
Turnaround time?
After we have mapped and planned our terrain, we then discuss and develop our Emergency Plan.
- Who has first aid/repair/rescue tarp?
- Who has radios? What channel should we use?
- What is our communication plan today? Radios, line of sight, voice command?
- What is our evacuation plan?
Step 5. Get Outside
Now you're out in the field, working together as a team and utilizing your tour plan to make good decisions and have fun. We help foster these good decisions and communication in the field through continually observing. Look, feel, smell, taste, poke, prod, scratch.
Weather
Is it in-line with the forecast? Any major changes? Wind loading, hot/cold temps, sky cover, precipitation?
Snowpack
How are conditions? Are the hazards in line with what we expected? Continually make snowpack observations in relation to the problems you are likely to encounter. *Using the right tool for the right job*
Terrain
Continually observe slope angles, terrain traps, trigger points, aspects, elevations. Is it a committing slope? What are the consequences if something does go wrong?
Team
Always check in with your teammates! How are you feeling? Do you want to stop and drink some water? What do you think about this? Did you feel that windslab?
(Photo: Lauren Powers)
Step 6. Debrief The Day

(Photo: Carly Finke)
Now you're back at the trailhead after hopefully what was a great day of skiing and teamwork. You're not done yet! What do we do now? Time to debrief! By doing this at the end of each tour you will be able to intentionally build off of your day's experience by reflecting on the good and the bad. This here is how we become better backcountry users. It doesn’t have to take forever, but try and ask yourself and discuss with your team.
- Summarizing the conditions. Were conditions as we seemed? Any surprises? Were they in-line with the forecast?
- What went well today?
- What maybe didn’t go so well?
- What would we do differently if we went back and did it again?
- Where were we most at risk today?