

Backcountry Basics: How Do I Get Started?
We're talking basics of getting started in the backcountry from choosing the right board or ski for you to safety equipment, fitness tips, what to expect from your first tour, touring practice tips & more! Reading not your thing? Watch the webinar sponsored by Colorado Adventure Guides.
Contributing Experts:
- Justin Ibarra
- Dillon, Colorado
- Colorado Adventure Guides / Colorado Snowboard Guides
- 14 Years backcountry experience

- Sarah MacGregor
- Gunnison, CO
- San Juan Expeditions / Aspen Expeditions, Colorado Mountain College, Glenwood Climbing Guides, Colorado Mountain School.
- Guide and educator of rock, environmental ed, splitboarding and all things Colorado for 13 years

What Is Backcountry?
Backcountry can be defined as an area that is remote, undeveloped, isolated, or difficult to access. Backcountry skiing or snowboarding would be utilizing this sort of area.

How does it differ from resorts?
The ski resort is a developed area that is regularly patrolled with avalanche control, medical personnel, lift access, etc.
What is "sidecountry" and is it still considered the backcountry?
Sidecountry is still considered backcountry as they are undeveloped areas that do not see patrolling or avalanche mitigation from the ski resort. Once you leave the boundaries of the ski resort you are in the backcountry.
Why do we go?
This.

What Skiing/Riding Ability Should I Have For The Backcountry?

If you are at a good skiing or riding level beforehand, you will get the most out of your experience in the backcountry. You can encounter a variety of snow conditions and you don’t want to be dealing with your skiing/riding technique as there are so many other variables that you need to focus on. I would say that you can definitely backcountry ski or ride if you can get down Blues/Blacks at a ski resort and feel mostly comfortable skiing through trees, but you will be much better off if you are capable of skiing Double Black Diamond terrain on the resort and are very comfortable skiing in trees.
Pro Tip: Get your skill level up on the resort before entering into the backcountry.
Many resorts allow uphill access in the mornings, so a great opportunity to hone in your fitness and skinning techniques. Beyond that just skiing/riding to the point where you can ski most of the terrain on the resort comfortably will tremendously help with your backcountry skiing/riding capabilities. Most resort’s websites will list an uphill policy unique to them. Make sure to find out what your resort’s policies are before you go.
Splitboarder Pro Tip: Practice split skiing in resort. It is an important skill for the backcountry particularly if you ever need to perform a rescue.
What Fitness Ability Should I Have For The Backcountry?

Moving through the mountains year round is an excellent way to stay in “mountain” shape. In the winter, touring itself is your go-to. During the off-season, focus on vertical gain, whether it be through hiking, running or biking, is going to benefit you hugely when you are back on the skin track and moving uphill. An increase in the amount of vertical gain you can achieve while on a tour equals more turns earned on the downhill!
Along with consistent aerobic conditioning, cross-training is a great way to supplement your physical fitness for the backcountry. Keep it simple and ideally use the activities you may already participate in. If you’re a rock climber, go climb! If you love to skateboard, tear it up in the skate park. The key is exercising a variety of muscle groups during that activity. For more specific training, focus on the core and legs, as these muscle groups are highly recruited on both the uphill and downhill. Squats, lunges and core work routines, such as Scott’s Killer Core are a great start. Stretching, whether it be basic or more advanced like yoga, and foam rolling are key to recovery after any training and will help prevent future injuries.


It is important for you and your partners to have the widest bandwidth possible out there so your mind is free to make snowpack observations and pay attention to potential risks in your environment and group. Part of maximizing your bandwidth is making sure it is not occupied by the strunuity of walking uphill. Feeling comfortable using your equipment as mentioned before is another important piece of keeping your bandwidth clear.
Pro Tip: Focus on rest and recover as you train. Quality sleep, good nutrition and adequate hydration are key. If you still feel tired from your last run or your muscles are sore from your last training session, take another rest day and re-evaluate. Listen to your body. Training while you are fatigued or not feeling recovered will only do more harm than good, taking you back one step instead of moving you forward.
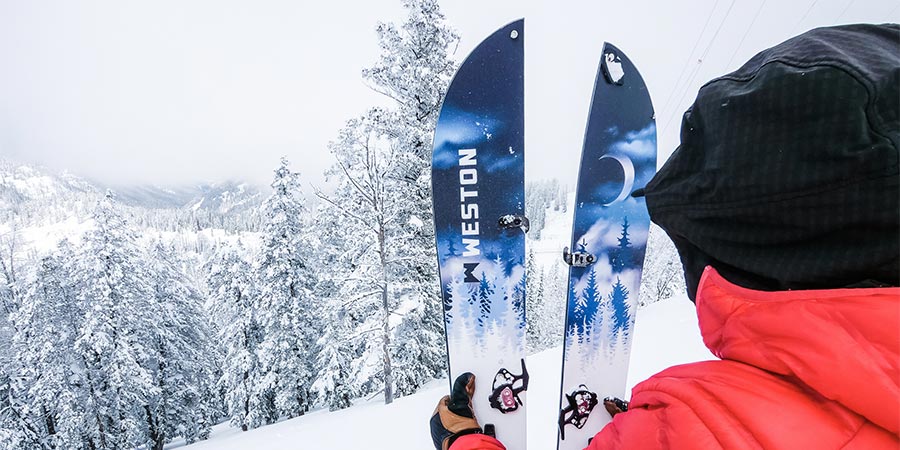
What Kind Of Ski Or Snowboard Do I Need For The Backcountry?
While there are many different sports to get you into the winter backcountry scene, for skiing or snowboarding you will need specific equipment. For skiing you will need an AT (Alpine Touring) Setup which incorporates bindings that allow your heel to lift up for the ascent and then lock down for the descent), AT boots (boots that have a walk-mode), climbing skins, and poles. For snowboarding you can always snowshoe but your best bet is to get a splitboard, splitboard bindings, climbing skins, and breakdown poles. Your splitboard will break into a set of skis for the uphill and then locks back together as a snowboard for the descent.
Alpine Vs. AT Ski


Snowboard vs. Splitboard

Pro Tip: Take advantage of demos to try new gear before you buy. Buy a factory made splitboard and don’t cut your own. Make sure to get 3 piece breakdown poles as a splitboarder. Take care of your skins!
What Safety Equipment Do I Need For The Backcountry?

Never go out into the backcountry without your beacon, shovel, probe, pack (and radio) and the knowledge to use them. Check out the Get The Gear webinar and blog to learn more about what else you should be packing.
Beacon
There are many manufacturers and models of transceivers on the market. Make sure to get a digital 3 antenna transceiver and whichever one you get, read the manual for specific details regarding your specific model. Purchasing a used transceiver is not recommended, as they are electronic devices that require care and maintenance. Know the history of your own device including how old it is, if anyone has borrowed it, and when the firmware was last updated.
Pro Tip: Best to wear your transceiver in the harness it came with. Keep your beacon 30-50cm away from any electric interference. Always do a beacon check before leaving the trailhead.

Shovel
The shovel may be what you spend most of your time with during an avalanche rescue. Three things to consider when looking for an avalanche shovel are material, blade size/shape, and handle configuration. Make sure your shovel is metal and not plastic. The longer the shaft and bigger the blade the better (as long as it can fit in your pack). The D shaped handle is the best in my experience.
Pro Tip: Some shovels have a special “hoe mode” which is very efficient at moving snow.


Probe
An avalanche probe is a critical piece of rescue equipment and should be easy to deploy, have a reliable locking mechanism, and have highly visible depth markers. Similarly there are a variety of probe manufacturers and models on the market. You will find different materials (aluminum, carbon, steel), lengths (240cm to 320cm+), thicknesses, ect.. I would personally recommend carbon or steel with good visual markings and longer length (260cm+).
Pro Tip: Get a snowsport specific pack and ditch the probe bag.

Pack
Get a snowsport specific pack that has a pocket dedicated for your probe and shovel. Ideally your daily touring pack size will need to be 30L or more. Airbags are a great idea as well just as long as you understand how they work and when they won’t.
Pro Tip: Organization is crucial. Dial in your pack by giving everything a home and that's the only place that it lives. That way you know exactly where to get it when needed.

Where Do I Learn About Avalanche Safety and Equipment?

AIARE Avalanche Courses. Attend Free clinics, read books and blogs, take an Intro to Backcountry Ski/Splitboard Course, seek out avalanche education courses such as AIARE, AAI or SAS
Find a trusted mentor. We love to be a continual resource for folks. Check out our Free Clinics and other course opportunities that we offer at www.coloradoadventureguides.com
Pro Tip: This is an evergoing process. Don’t try to skimp or jump any hoops. Start easy and work your way up. Find a mentor and only go out with people that you trust.
What Can I Expect From My First Backcountry Tour?

Typical Timeline: The cool thing about backcountry riding is that it is up to you! Your tour can vary from an hour up to multiple days. The more you get out the more zones you will explore and will be able to pick and choose based on your day's agenda.
Challenges: Your first tour can seem daunting but by the end of the day most people are relieved and completely stoked. It’s going to feel awkward and you will use muscles you didn’t think you had, but it is a blast. I recommend going out with someone that has experience and patience that can help show you the ropes, or hire a guide/ sign up for an Intro course. Forgetting gear is also very common!
What does the season look like for backcountry?
Touring Tips

Resort skinning: Most resorts allow uphill access. Check with your local ski resort to learn their protocols. Resort skinning is a great way to get exercise and dial in your skinning technique and gear in a lower risk environment.
Demo a split and pursue a guided day: Check out your local areas or shops for demos or better yet you can try to demo through an outfitter and head out for a day of mentorship/instruction with a guide.
Intro to Backcountry On-Snow Clinic: Make sure you learn how to use your gear along with your transitions and basic skinning technique before heading into a Level 1 Avalanche Course. The Intro to BC Ski/Splitboard Course is meant to be a precursor to the Level 1 and will cover all of that for you.
Get out with like minded partners or a backcountry mentor: Make sure you only get out with people that you trust and who will respect your voice and veto. Finding a more experienced partner to take you under their wing as a mentor is a great way to learn as well.